Installing Ford Focus Emblem Insert Overlay Decals
WEATHER WARNING
The temperature that you install your decals in is the most critical element. Temperatures must be between 60°F to 90°F.
The weather that the decals are exposed to cannot go below 60 degrees for 5-6 days. This is due to the water used during the install. The time is needed to allow the water between the decal and emblem to completely evaporate. There may be bubbles in your decal until the water has fully evaporated.
For more details about proper temperatures and weather conditions, click here.
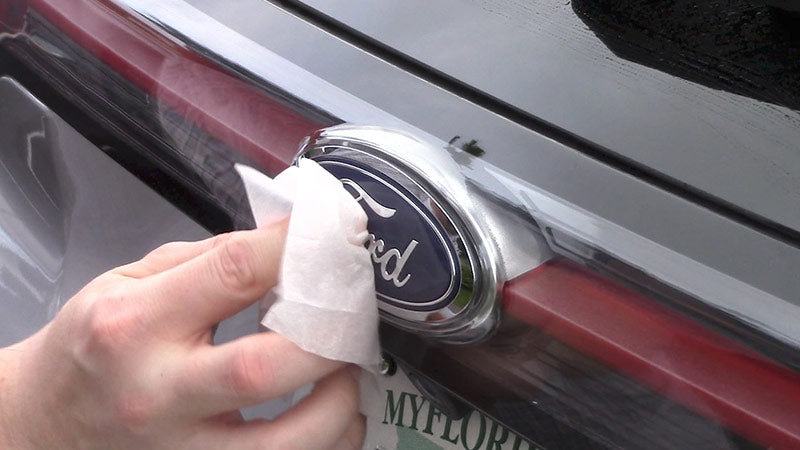
Clean Factory Emblem
Thoroughly clean your vehicle emblems. Make sure to spend extra time cleaning the crevices and edges. Assure your emblems are free of any dirt, grime, or grease.
Failure to clean your emblems properly may result in a shorter life for your emblem insert overlays.

Wipe Emblem With Alcohol
Using the included Isopropyl Alcohol wipes thoroughly wipe down and clean any area of your emblem that is blue.
This will help remove any remaining grease or other contaminants.
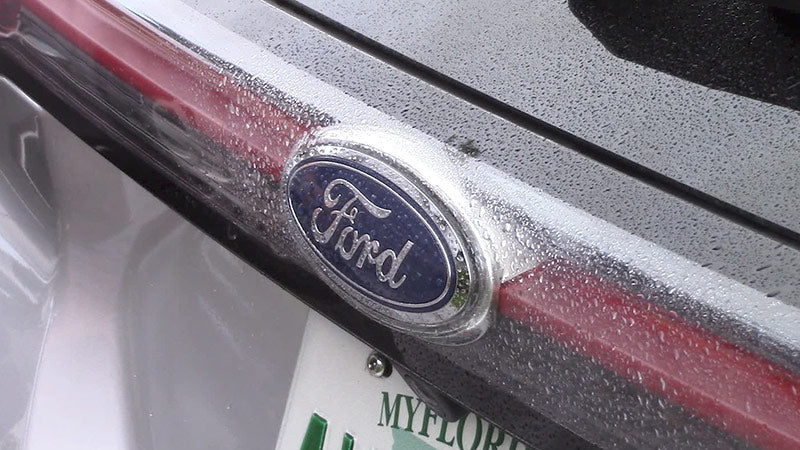
Mist Emblem With Water
Using a spray bottle, mist water over the blue areas of your emblem. The water will allow you to adjust the placement of the decal to allow an exacting fitment.
Failure to wet down the emblem will make installation dramatically more difficult.
Remove Decal Paper Back
Your emblem insert overlays have two parts to them. One is a white backing paper; the other is a clear front application tape.
Begin peeling the white paperback from the decal.

Lay the clear application tape portion of the decal face down on a solid, flat, clean surface, such as your windshield or trunk.
Slowly peel back the white backing paper at a sharp parallel pattern to the application tape.
Make sure the decal sticks to the clear application and no portion of the decal comes off on the backing paper.

Mist Decal Back With Water
Spray the back of the decal with water.
Line up the decal with the blue portion of your emblems and lightly overlay the decal.
Do not apply too much pressure at this time, as you will need to make adjustments to your alignment.

Align Decal Over Emblem
Using the Ford portion that is cut out in your decal, align it to the inner chrome lettering. Take your time to make your adjustments. This is a critical step to ensure a properly installed product.
If you are finding it difficult to move the decal for alignment, you may not have enough water for proper installation. You may gently remove the decal and apply more water to the emblem and back of the decal.

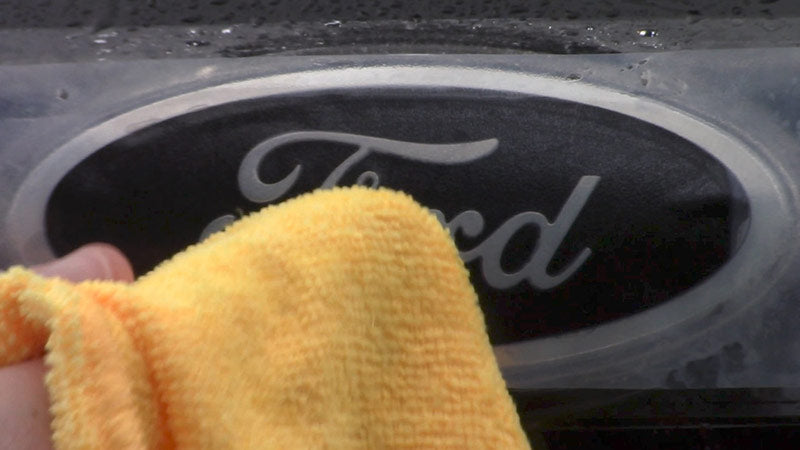
Press Out Water
CRITICAL STEP
This step is critical to avoiding wrinkles and getting the decal to adhere well. When working out water in this step work from the center of the decal and work your way outward. Also make sure to take your time in this step. The more time you spend here the better the decal will adhere in the future steps below.
After you have aligned your decal correctly, begin to blot the decal to work out the water. Start from the inner areas of the decal and work your way outward.
It is better to use a blotting pattern over wiping at this point.
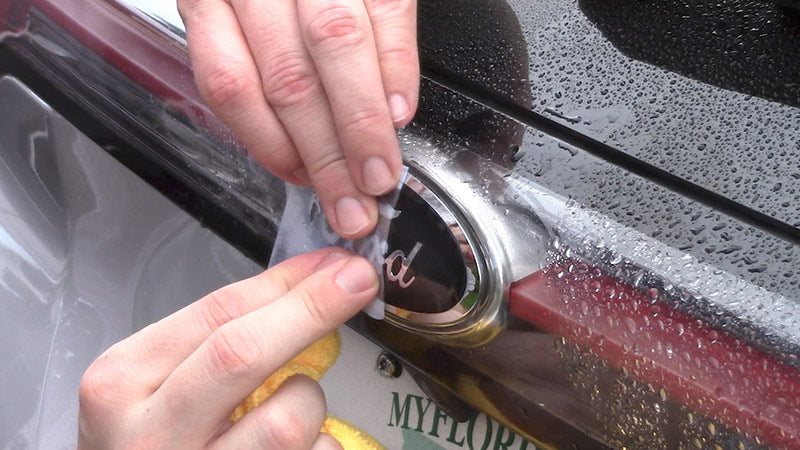
Remove Clear Application Tape
Carefully peel back the clear application tape. Start on the left or right and make sure to decal stays on the emblem. You can use your finger to hold down the decal to the emblem.
Slowly pull the clear application tape back at a 180 angle. Be careful to not let any of the decal stay on the clear application tape. If part of the decal stays on the application tape put the application tape back on until that portion of the decal is on the emblem and pull the application tape back again. Use your finger to hold the decal to the emblem if necessary.
Press Decal Into Place
After the clear application tape is completely removed firmly press in and tab the decal. Start in the center and work your way out. Do not wipe the center of the decal, as this can pull up the smaller pieces.
You can wipe the decal on the outer portion where there are no smaller cuts.
Work your way around the decal until you do not see any more water come out.

Remove Water With Heat
HEAT GUN WARNING
When heating up your decals make sure to only heat them until warm to the touch. Do not overheat your decal overlays. Doing so can dry the material and cause premature ripping and damage.
To do the final drying process we recommend using a heat gun on its low setting, or a hairdryer on its hottest setting.
You can alternatively let the decal dry in the hot sun for a day.
If you do use a heat gun or hairdryer lightly heat up the decal while constantly moving the heat gun or hairdryer. Do not let the heat focus on one area, as this can damage the decal.

Final Thoughts
If you have left the decal in the sun for a day, or you have heated up the decal with a heat gun or hairdryer, perform the following last step.
Gently work out any bubbles remaining. Remember to use a dabbing motion in the middle so as not to pull up any of the smaller cut portions of the decal.
Firmly run your rag along the outside to allow the decal to fully adhere to the emblem.
